Create Your Own Mala
Lately, I have felt a pull towards meditating with a mala. As discussed in my previous post, it can really help you stay focused and keep track of mantra repetition. After looking at a few to purchase, I realized the one I desired didn't exist yet, and it was up to me to create it!
Creating this mala was a great project (and not terribly difficult), so I thought it would be fun to share with you how to make your own!
During its creation, keep a general thought of well-being or your personal mantra in mind. It can help to set your intent while creating your mala, and can become a meditation in and of itself!
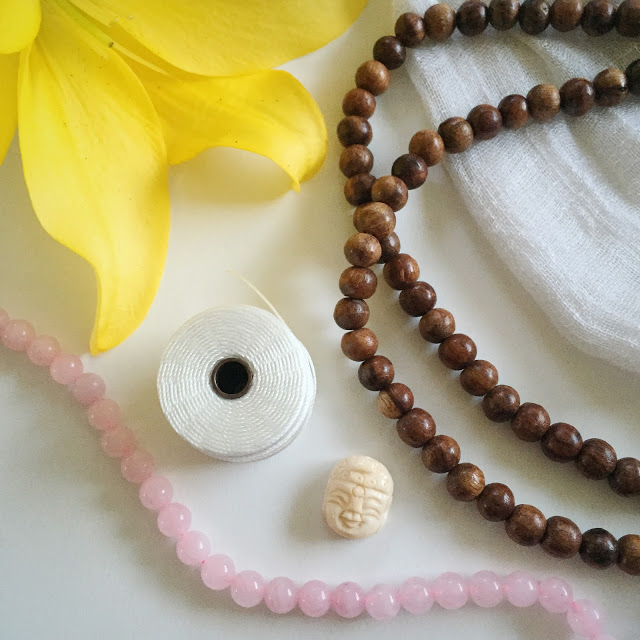
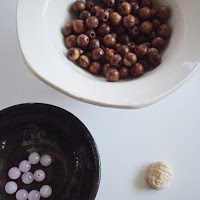
What you will need: wood/seed beads and/or gemstone beads, a larger "guru" bead, a strong nylon string, and embroidery floss. If mixing types of beads, try to keep them a similar size as to keep meditation as seamless as possible. In addition, I found a beading needle to be extremely helpful with threading (which can be found at your local craft store).
Begin by counting out 108 beads (not including your guru bead). For my personal mala, I chose to have 94 wooden beads, and 7 rose quartz beads on each side. I incorporated rose quartz into my mala since my mantra focuses opening up my heart chakra, and rose quartz has a soft, compassionate energy that encourages unconditional love, dissolves emotional wounds, and offers inner peace.
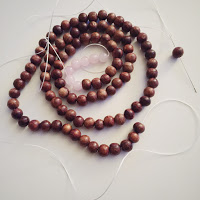
Now comes the time consuming, yet oddly satisfying, part. Leaving at least 6 inches of extra thread on the end, create a knot so your beads will not slide off. Since I wanted to have mirroring rose quartz on either side of the guru bead, I started with my first 7 rose quartz beads, then went on to add the 94 wooden beads, then the remaining rose quartz beads. If you have the time (and the patience), place a knot after each bead to create a small space between them (which not only helps in meditation, but also keeps beads from going everywhere in case it breaks).
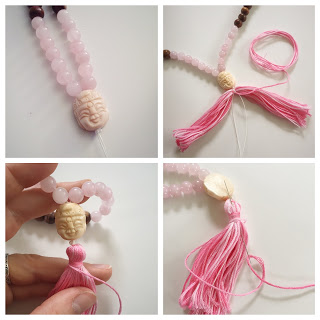
Time to make the tassel! Take your embroidery floss (I used a single packet that had transitioning colors) and separate at least 8 inches from the main group, but do not cut it off (just place it out of the way to the side). Then, tie your extra nylon string coming from the bottom of the guru bead around the floss and knot on the bottom of the bundle to attach it to your mala. Fold over the embroidery floss to hide your knot, and wrap the 'set aside' floss around the top multiple times. Once satisfied, loop your remaining thread through the tassel to create a knot. Cut the end of the tassel to eliminate loops or uneven edges, and you're done!
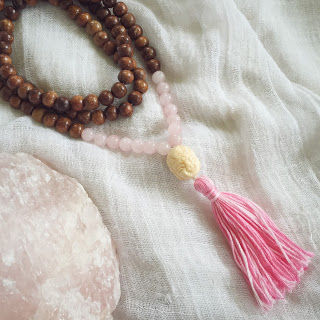
Congratulations! You are now the proud owner and creator of a beautiful mala!