Posts tagged natural healing
Essential Oil Guide: 21 Drops Review

I am always on the hunt for new essential oil products and brands. Essential oils are a fantastic way to naturally improve our well-being on a mental, emotional, and physical level. 

I most recently discovered 21 Drops, and was immediately intrigued. When asked what set them apart from other essential oil companies, their response was what sealed the deal! 
  1. All of the essential oils used in our blends are therapeutic-grade, 100% natural, sourced from artisan distillers, organic or wild-crafted, and GC-MS tested to ensure their upmost purity and effectiveness.
  2. We focused on the molecular chemistry, so you can focus on the physical. Our remedies are pre-blended to treat some of the most common conditions, allowing you more time to spend time with your partner or try that new yoga class.
  3. All of our essential oils are safely diluted in 100% jojoba carrier oil.
  4. Our bright, colorful rollerball packaging makes our blends easy to toss into a purse, place aside your bed or at your desk at work. Basically, they're way more fun and simple to use.  
What's not to love? Unable to narrow it down to just one oil (how can you choose between 21 amazing blends?), the wonderful folks over at 21 Drops were kind enough to send me over the Let's Celebrate Trio to review, and I am in love!

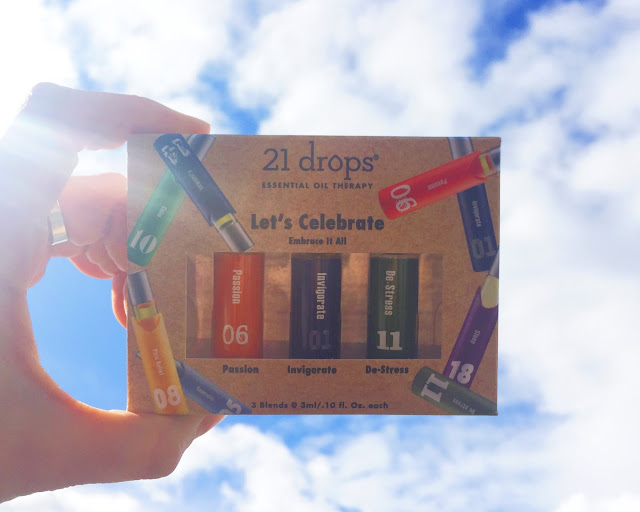
The Let's Celebrate kit includes three 3ml oil blends: Invigorate, Passion, and De-Stress. Each blend is formulated specifically for inhalation and topical application, and every one comes with a fantastic affirmation!

Invigorate (#01) is a combination of black pepper (enlivens & motivates), cedarwood (maximizes endurance), juniper (energizes & invigorates), and rosemary (stimulates the mind). The affirmation that comes with this oil is "I initiate. I act. I deliver." This has been my go-to oil for early mornings and mid-afternoon for when I need a pick-me-up! Caffeine never seems to agree with me (if you ever see me with super shaky hands and looking a little grey, its likely the barista accidentally switched my decaf for something higher octane), so coffee is usually too strong for the usual slow-moving moments. However, one whiff of this blend is enough to get me moving, and once I put a little on my wrists, I am getting things done! I've started keeping this one on my desk so that whenever I feel myself loosing steam, I can have it within reach so I can get back in action! 

Passion (#06) is a combination of cardamom (enlivens & refreshes), jasmine (diminishes fears & inhibitions, rose (invites feelings of love), and sandalwood encourages self-acceptance. The affirmation that comes with the blend is "I am open. I am playful. I am inspired." If sunshine came in the form of an essential oil, this would be it. When wearing Passion, I feel radiant and goddess-like. The floral aspects make it a great date night scent, but I love wearing it anytime I want to feel sunshine-y and special!

De-stress (#11) is a combination of frankincense (quiets the mind), German chamomile (reduces tension), lavender (reduces anxiety), and ylang ylang (helps ease panic attacks). The affirmation is "I accept. I bend. I release." This oil is my new signature scent, hands down. I usually have an affinity for similar blends (as an old flame once proclaimed: "You always smell like tea... It is a good thing, I swear!"), but 21 Drops De-Stress takes the cake. Every time I put on this essential oil, I can feel all of the tension in my body melt away, and I am left relaxed and smiling. 


After the success of these three blends, I cannot wait to try their others! The next ones I have my eye on are #03 Strength, #07 Equalize, #12 Uplift, and #17 Digest, not to mention getting bigger sizes of what I already have!

Have you tried 21 Drops yet? Check them out on their website, and enjoy!
How to Play A Tibetan Singing Bowl

The use of Tibetan bowls for healing and meditation is a technique that has been around for centuries. They are found in monasteries, homes, and it is likely you have come across one at a meditation group or yoga class. They can be a very powerful spiritual tool, but don't be intimidated, Tibetan bowls can be played and enjoyed by everyone (no matter their spiritual path).

When it comes to purchasing your first singing bowl, I typically recommend trying a Tibetan bowl first, as they are more durable than a crystal or porcelain singing bowl. Tibetan bowls are traditionally made from 7 different metals (each to represent a different planet). This durability lets you experiment with different healing techniques, such as filling the bowl with water or placing it on the body, with less of a risk of damage.

As for which Tibetan bowl to buy, that is where your intuition needs to come into play to give you your final answer. It might be difficult, but try and buy your bowl in person, or at least on a website that gives you a preview of the sound. There is a large variety between bowls, and you have many choices to choose from! Big bowls will have a deeper resonance, whereas smaller bowls will be higher pitched. Many people like to look for a bowl whose note corresponds with a specific chakra (C/root, D/sacral, E/solar plexus, F/heart, G/throat, A/third eye, B/crown). As tempted as I am to go out and find a variety of different bowls to add to my collection, I try to purposefully only get the bowls that really jump out as special to me. Remember that especially with singing bowls, it is all about intention, and you can heal the whole body/every chakra with one bowl if you wish. Allow your collection to grow over time, and revel in the individuality of each bowl.

Okay, everyone have their bowls? Awesome! Let's play!

Hold the bowl in the palm of your non-dominant hand. Be sure not to touch the sides of the bowl as that is where the vibration resonates from.

With the striker, gently strike the bowl to get the vibration going.

Try rubbing the outside rim in a circular motion, keeping an even pressure. Getting your Tibetan bowl to sing like this takes practice, so keep at it!

Many people enjoy the sound of Tibetan bowls because they can psychically feel the vibration deep within them. When listening, breathe deeply and perhaps visualize the waves of sounds working their way through your body, leaving only positivity and relaxation in their wake.

Although you can heal by merely holding the bowl or being near it as it plays, there are many other techniques you can try! Here are some ideas:

Lie down, and place the bowl on the chest, belly, above your head, or between your legs. With the striker, gong the side of the bowl and allow it to resonate through your body for at least 20 seconds until you strike again. 

Once you have mastered playing the bowl while it rests on you, take it up a notch. Fill the bowl no more then 1/4 of the way full with warm water, and place it on your body. Strike, and allow to resonate for at least 20 seconds.

If you have two bowls, place one on your body while laying down, and one on the floor a few inches above the head.

Take turns with a partner placing it on each others backs and shoulders and playing, experimenting the difference in sensation between just striking and rubbing the bowl.

Experiment with different strikers and tools to learn the differences between their results.

If you have a big enough bowl, turn it upside down and put it on your head! (You likely want to put a small cloth or cushion between the bowl and your head to help it balance so you don't hurt yourself or the bowl.) With a slightly downward motion, strike the side of the bowl and allow the vibration to flood through your body. This can be a great way to relieve headaches or stress!

What is this bowl doing on my head?

In the following video, I demonstrate three beginner techniques using a suede covered tool, a wooden tool, and a felt mallet, along with how to play the bowl while it is on your head.


Bowls get better as they age, so whenever you feel compelled to play, do so!

Have you ever played a singing bowl? What singing bowls do you have?
Crystal Spotlight: Labradorite

Today, I'm shining the crystal spotlight on one of my absolute favorite stones: labradorite! Isn't it ah-mah-zing?! I wear my labradorite Joyful Jewelry pendant all the time (have you checked out her incredible jewelry yet?!), and have a few other beautiful pieces in my home.

Its name comes from Labrador, Canada, where it was first discovered in 1770. However, labradorite can be found in a variety of places all over the world. In Finland, it is referred to as spectrolite, but typically has a larger range of colors than most labradorite.

At first glance, it may seem predominately grey or black with a shimmer of blue or green. When you rotate it slowly, however, it flashes amazing iridescent sparkles of bright blue, gold, red, and orange. Flattering in every light, it is one of my favorite stones for jewelry because it goes with everything and gives you an alluring glow.

Given its transitioning colors, it shouldn't be surprising that it is a wonderful crystal to help you navigate life's changes and transitions! Sometimes called a power stone, labradorite is the perfect stone to help you with the transition towards positive growth and higher consciousness.

Some Inuit tribes believe that labradorite fell from the frozen fire of the northern lights and shines in a magical light that separates our world from unseen dimensions and realms. Labradorite is a powerful assistant in strengthening our intuitive abilities and stimulates spiritual awakening. Strengthening your natural energies from within, it aids in self awareness and helps us keep in touch with our highest self. On a physical level, it aids with eye and brain disorders, can lower blood pressure, boosts metabolism, and aids in digestion. Additonally, women find wearing it beneficial to balance hormones and relieve menstrual symptoms.
 
Here is my Joyful Jewelry necklace up against a beautiful rough piece of labradorite.
Hope you enjoyed learning a little more about labradorite! Now that I have shared one of my favorite crystals, what are your favorites? Do you have a crystal that you would like to learn more about?
Sleep Better with Bedtime Yoga

I am a big believer in nighttime yoga. I fall asleep faster, sleep deeper, and feel more relaxed the next morning. My only issue? I get so relaxed afterwards that the journey from my yoga mat to the bed seems a million miles away! My solution? Yoga in bed! Once you are done, close your eyes and drift off... perfect!

Unlike the typical, fast-paced yoga class you may have attended at your yoga studio or gym, this practice is very yin based: slow, relaxing, and deep. Spend a little while in each pose to enjoy all of the lovely benefits.

This is a short and sweet version of my nightly routine... aka: no excuses not to do it! Some nights I spend more time and add in additional poses, but at the very least, I do this routine nightly to release any stress and tension (and recommend you do the same).


Begin by sitting cross legged in the center of your bed. With your back straight, center yourself by focusing on your breath. Hands can either rest on your knees or held in front of your chest in prayer. Using Ujjayi breathing (yoga breathing where your breath sounds similar to ocean waves), take the first few moments of your practice to let go of the day's events and stress.


Place your right hand on your left knee and your left hand behind your back. Exhale while gently twist your torso to the left, and allow your gaze to follow. Breathe in deeply and allow the breath to fill the empty space being created by your stretch. Slowly release, and repeat on the right side.


Turn to face a wall (or your headboard). Laying flat on your back, scoot your butt a few inches away from the wall, and place your legs straight up against it. Relax into the pose, and make sure not to lock your knees. If the stretch is too much, back away slightly from the wall. Remember to breathe in deeply, and feel the breath filling your belly as you sink heavier into the bed.  Remain here for a full minute or two.

Next, lie on your back with your knees bent. With an exhale, bend both legs back towards your belly. Inhale and grip the outsides of your feet with your hands. Bring your knees towards your armpits by opening your knees slightly wider than your torso. Make sure your ankles are stacked over your knees so your shins are perpendicular with the bed. Breathe deeply, and slowly pull your hands down to increase the stretch to a point you feel comfortable with.


When you are ready, return to laying flat on your back with your arms and legs stretched out slightly away from your body. The goal is total relaxation, so if need be, place a pillow to support under your legs. Remain here for at least five minutes. If you're like me, however, you will snoring pretty quickly!

Enjoy the restful sleep, and namaste!
Center Yourself with Alternate Nostril Breathing

For thousands of years, yogis have believed in the power of breath. To this day, yoga instructors even go as far as to say that if you lose track of your breathing during your yoga practice, you basically void the benefits of your asanas. Long story short: breathing is a crucial part of yoga!

Pranayama, or yoga breathing, makes you more connected to your breath. Although it is important to practice during your yoga practice, it can be beneficial to practice before meditation, right before you go to bed, right before you wake up, or when you just need to recharge. I have found that returning to my yoga breath can really help when I am stressed and need to reset my brain, like when I am hanging off of a mountain on a hard rock climbing route.

A technique that I love and have been using everyday is alternate nostril breathing (also known as Anulom Vilom). It is a great beginning pranayama practice, and can be done by everybody!

Alternate nostril breathing can be an extremely therapeutic and calming ritual. It cleanses your lungs and your mind, calms your emotions and your nervous system, encourages the flow of prana (energy), and can relax a restless brain and body. Doesn't that sound wonderful? Lets get to it!

Begin by getting into a comfortable seated position on your yoga mat. Sit up straight, with your neck, back, and tailbone stacked. Using your right hand, place your pointer and middle finger on your third eye (in the middle of your forehead just above your eyebrows). Take a few relaxed breaths until you feel centered and ready to begin.

Using your thumb, close off your right nostril. Slowly breathe in through your left nostril for a count of four. Hold breathe for a count of four.

Close off left nostril with your ring finger, and release your right nostril. Slowly breathe out for a count of four. Inhale though the right nostril for a count of four. Hold for four, then release through your left side as before. Repeat a few rounds of this alternate breathing and feel how your body responds to this gentle and nourishing practice.

Remember:
Never be forceful with your pranayama practice. If holding four counts is too much, try shorter increments until you can work your way up to it.
Health conditions, such as high blood pressure, might mean that you shouldn't participate or hold your breath. (Translation: Talk to your doctor.)
If possible, try to practice on an empty stomach or if has been a few hours since eating.

Do you practice pranayama? How do you use yoga breathing techniques in your everyday life?
How To Use A Pendulum

Lately, I have had a lot of requests to do a post explaining how to use a pendulum. Since many people use pendulums as a natural healing tool, it sounded like a perfect topic for Blue Lotus! 

My first exposure to pendulums was as a young child, when a naturopath used one to decide between which remedies would help with a terrible cold I was suffering from. My mother carries a pendulum in her purse at all times, and I always have a few floating around my house.

So what the heck is it?

A pendulum is a great tool for receiving intuitive information. Whether you are using it to decide which homeopathic medicine is best, or to realize what the right choice is when faced with a difficult decision, it allows you to find answers. Although it is a tool as simple weight on a string, it allows you to connect with the energy of the world around you, along with your personal energy, and find your truth. Sometimes needing to make decisions, big or small, can cause doubt. Pendulums can help you to to get your gut answer, without your head getting in the way.

To use one, hold the chain (or string) between your thumb and index finger. Keeping your hand and arm still, silently (or aloud if you wish) say "Show me neutral". Neutral is typically spinning evenly clockwise or counter clockwise. When you are first learning, I have found giving your pendulum a slight movement with your hand can be helpful to get it started. Then, say "Show me yes." Yes is typically a left to right movement, and your neutral circle will slowly tighten until it begins floating back and forth. With this, return to neutral. We are then left with "Show me no.", which will be towards and away from you. Then, return to neutral and ask yes or no questions directly. If it is unclear, make sure you are focused and try to phrase your question more directly. A great way to start a question can be "Is it in my highest good to _____?", but keep the repeating thought of "truth" always in your mind.

Some people can find that pendulums go other directions for yes or no, but I personally have found that the most accurate answers come from 'yes' being left to right movement (and have had spiritual leaders encourage it as well). However, if you find that your yes, no, and neutral is a completely different direction (such as switched around, counterclockwise spinning, or any other option), it is totally fine as well! Go with your gut and let the answers come to you!

It takes practice, so put some time in! Some people love to carry their pendulums with them so they can practice wherever they are!

Have you ever used a pendulum? Do you have any tips to add? I'd love to hear them!

P.S. Keep your eyes open for an upcoming pendulum giveaway! It will be posted both here and Facebook, so make sure you've liked

Blue Lotus Bozeman

to get the latest updates!

Delicious Lemon & Mint Detox Drink

This summer, I decided to take on a new challenge: a container herb and vegetable garden. Among my large, random variety of plants (I went a little overboard at the plant nursery), my mint plant is the first to produce enough to harvest!

With my abundance of mint begging to be used, I decided to make a refreshing drink to combat these toasty summer days that would have detox benefits as well.

With three ingredients, it is so easy that I can barely call it a recipe. All you need is half a lemon, 4-6 mint leaves, and water.

Slice up your lemon into wedges or slivers and add to your jar. Rinse your mint, crush it slightly to release the flavor, and add to your jar. Top off with tap, filtered, or Vitajuwel water, and you are good to go!

Mint provides delicious flavor, but it also has some wonderful health benefits as well. It soothes the stomach and digestive tract, is believed to relieve hiccups, sinus congestion, and is an incredible antioxidant.

Adding lemon to your water gives you a vitamin boost, aids your digestion, cleanses toxins, and balances the pH in your body.

I create a large jar of this in the morning to enjoy when I first wake up, because it jump-starts your metabolism and helps you wake up after a night of sleep. Once my initial glass gets low, I continue to top of my jar all day, until the lemon and mint completely lose their flavor. It has become my go to beverage for the summer, and although right now I keep it cool to beat the heat, I imagine it will be really tasty with warm water in the winter!

Enjoy your new tasty beverage!